Writing a minimal boot sector for the v86 emulator
I came across this x86 virtualization project yesterday on a bored Sunday afternoon. I’m not sure how I didn’t find this project earlier. Check it out.
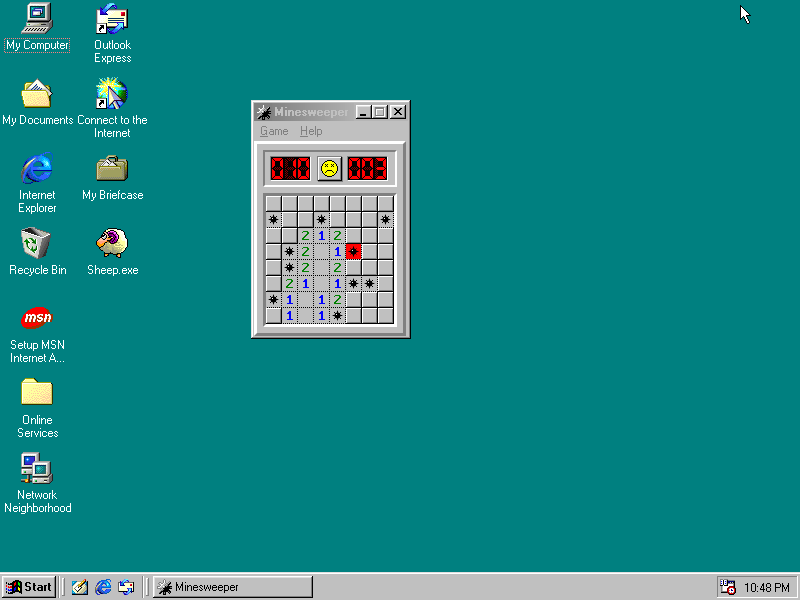
This is incredible. A x86 emulator written in JavaScript. Yes, JavaScript! It supports Windows 95, 98, and even MS-DOS. This hits home because these are the OSes that I used growing up as a kid. Seeing them emulated on modern hardware is quite the trip. Even better, it’s all done in JavaScript and runs within your browser. Oh how far we’ve come…

The Clouds desktop wallpaper, the de facto “cool” wallpaper.

20 years later and I still suck at Minesweeper.
I decided to write a minimal boot sector to test things out. It’s pretty straightforward with just a few quirks along the way I had to work through. I’m working on macOS 10.12, but everything should be fairly straightforward on any Unix-based system.
Cloning the v86 source
First thing, let’s clone the repo. Technically this isn’t necessary, but I like running things locally so I can mess with the code, add debugger statements, etc.
$ git clone https://github.com/copy/v86 |
Since we’re running locally, We need to run a server or else Chrome (or any modern browser) will freak out over cross origin requests used to load the OS images. Luckily we’re provided one within the repo:
$ cd v86 |
This uses Python’s SimpleHTTPServer to serve all the files locally. Now we can open up a web browser (you may have to first allow network connections from Python): localhost:8000/debug.html.
We see a bunch of predefined images under Quickstart, but we won’t bother with any of those (they must be downloaded separately and aren’t included in the repo we just cloned). They sure are fun to play mess around with though. I recommend doing it directly from copy.sh/v86.
Writing a simple boot device
Alright, without clicking anything else, hit ‘Start Emulation’. We see a BIOS message which tells us booting has failed due to no bootable devices. So let’s make one!
I won’t go too in depth into how an x86 processor boots up. There’s plenty of resources out there that go into it in depth. One of my favorite is this unfinished draft, “Writing a Simple Operating System - from Scratch” by Nick Blundell. I recommend Chapters 2 and 3 as a basis into writing boot sector code. I can’t remember how I found it, but it’s quite illuminating if you’ve never written code outside of userland before.
Here’s our minimal “Hello world” boot sector:
; |
We can compile it to binary with nasm:
$ nasm -f bin os.asm |
The -f bin flags instructs nasm to output raw binary. Let’s open with a hex editor and verify our boot sector:
bd00 8089 ecb8 c007 8ec0 bd1e 00b4 13b0 01b3 0bb9 0c00 b602 b200 cd10 ebfe 4865 |
Notice it’s 512 bytes (the length of a sector), and the last bytes are the magic number 55AA. The “junk” in the first 20 bytes or so is our boot code!
This bootsector will work with emulators like Bochs and Qemu, but One quirk with v86 is that we must provide a “full” floppy disk, not just the first sector. Pro tip: always have your network tab open in Chrome in order to see debug messages!
Looking at the v86 code, we can see the different floppy types supported. src/floppy.js:
var floppy_types = { |
We’ll target the first, smallest one, which is more than enough for our purposes.
this.floppy_size is the number of bytes of our OS image. Right now it’s 512, but we clearly need to add more bytes to make it a “full” floppy. Each sector is 512 bytes, and there are 8 sectors per track. 512 * 8 * 40 = 163840 bytes.
We can also verify this by bitshifting floppy_size 10 to the left. Our desired “size” is 160.
> 160 << 10 |
Perfect! So our floppy needs to be 163840 bytes long. Since our boot sector is already 512 bytes, we just need to add 163840 - 512 bytes to the end, which is exactly what we’ll do:
times (163840-512) db 0 |
Let’s compile it with nasm again and then run it. Here’s the complete assembly code.
$ nasm -f bin os.asm |
Booting our floppy image
Go back to the v86 web page and hit the “exit” button to return to the main screen. We’ll choose our newly crafted floppy image as the “Floppy disk image.” Hit Start Emulation, wait a few seconds, and voila!

There you have it, a bootable floppy image in ~17 lines of assembly. There’s so much more we can do from here. I had fun playing around with the v86 source code, setting debugger statements here and there and seeing how the emulation works. It’s complex, but at its essence it’s not doing anything magical. Take a look at src/instructions.js where we can see (almost) every x86 instruction fully emulated.
In JavaScript.